
Extending the Service Life of High-Pressure Swivel Joints: A Field Engineer’s Perspective on Process Research
You know, I’ve been in this patch for over twenty years. Started as a hand on a drilling rig in the Permian, got my mechanical engineering degree nights and weekends, and for the last fifteen, I’ve been the guy they call when the iron starts breaking. I’ve seen more busted swivels, cracked manifolds, and washout’d flanges than I care to remember. The sound of a 10,000-psi line letting go? It’s a sound you don’t forget. It’s a combination of a gunshot and a snake strike, followed by the god-awful hiss of million-dollar fluid cutting through steel like a waterjet through plywood. And in a shale play, that’s time, money, and sometimes, it’s safety.
A lot of academic papers talk about extending the life of high-pressure (manifolds). They talk about finite element analysis and stress ratios. And that’s all good, don’t get me wrong. But what I’ve learned, standing in the mud with a pair of calipers and a borescope, is that the devil is in the details. The theory is the map, but the field is the terrain. And the terrain is littered with the carcasses of swivel joints that looked perfect on paper but failed after 50 stages.
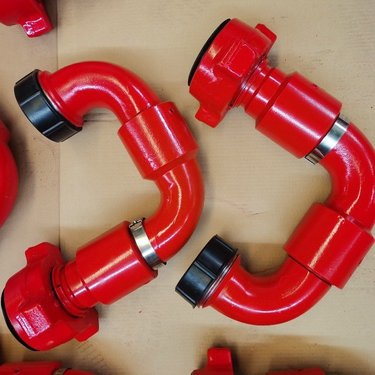
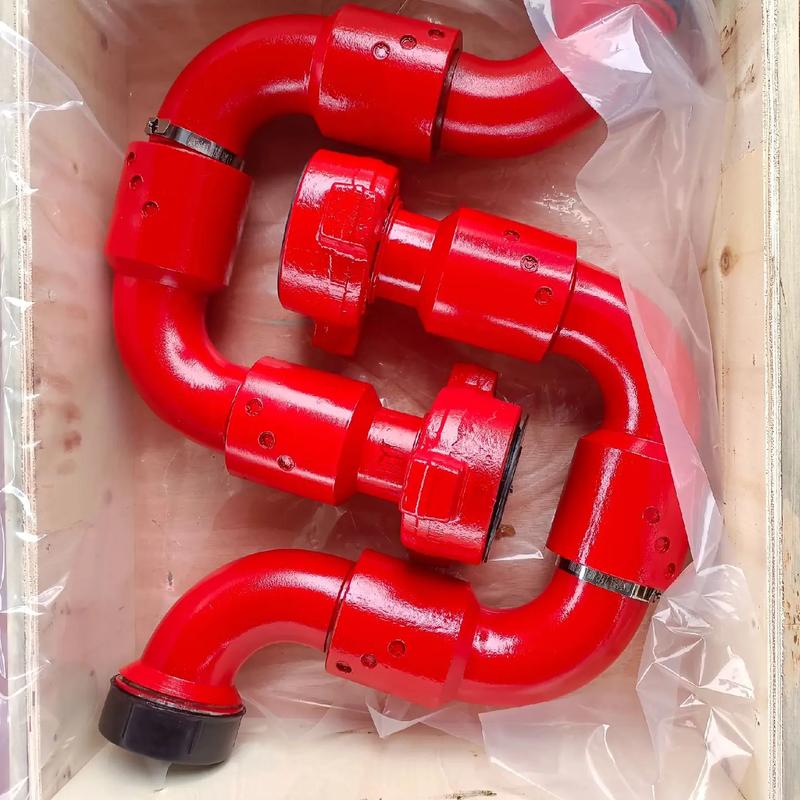
So, when we talk about extending the life of high-pressure swivel joints – specifically, the ones we beat to death on frac spreads – we’re not just talking about one thing. We’re talking about a system. It’s the metallurgy, absolutely. But it’s also the heat treat, the thread dope you use, the way the iron is rigged up, and the goddamn water hammer every time a pump hesitates. This paper, if you want to call it that, is about one specific piece of that puzzle: the heat treat process. It’s a deep dive into a modification we started running on our 50-type swivels about eight years ago, trying to chase down that extra 20% life that keeps a spread running through the weekend without a major failure.
The Anatomy of a Failure: It’s Never One Thing
Let’s get one thing straight. A swivel joint failure? It’s rarely a single event. It’s a fatigue crack that started at a microscopic inclusion, grew a little every time the pressure cycled, and finally busted through when the remaining wall thickness couldn’t hold the load. I’ve sectioned dozens of these things after they’ve failed. You can see the beach marks on the fracture surface – like rings on a tree – telling you how the crack grew.
We were running a big pad in the Eagle Ford back in 2016. High pressure, high proppant loading. We were burning through swivels on the missile. The standard ones, with the standard 20CrNiMo heat treat – quenched and tempered, nice and simple – were lasting maybe 60 to 70 stages before we’d start seeing washouts in the radius section, right where the bore turns the corner. That’s the killing field, right there. The fluid changes direction, the proppant loses momentum and just hammers that wall. It’s erosion, but it’s erosion that’s assisted by corrosion and micro-cracking.
So, we went back to the drawing board. Or, I went back to the shop and started arguing with our metallurgist, a brilliant old-timer named Klaus who smoked a pipe in the break room, which is just weird in West Texas. The argument was this: We need the core to be tough, but that ball race and the internal flow path? They need to be hard as a coffin nail.
The Material: Why 20CrNiMo (and a Nod to the Code)
The base material we settled on is 20CrNiMo. It’s the industry workhorse. You see it in a lot of Grade 100K iron. It’s tough, it’s weldable (if you have to, though I’d rather you didn’t), and it has good hardenability. It’s the 8720 steel, for those of you who speak AISI/SAE.
But here’s the kicker. The “standard” chemistry window is too wide. The difference between a good heat of steel and a bad one is what you don’t see. The sulfur and phosphorus, the tramp elements. They’re cheap, and they kill you.
Table 1: Chemical Composition (wt%) – The Devil’s in the Details
| Element | Standard Spec (wt%) | Our Internal Spec (wt%) | Why We Tightened It |
|---|---|---|---|
| C | 0.18 – 0.23 | 0.19 – 0.21 | Tight control for consistent core hardness after our modified cycle. Too much carbon in the core, and it gets brittle. |
| Si | 0.17 – 0.35 | 0.20 – 0.25 | For deoxidation, but too much promotes graphitization. Keep it consistent. |
| Mn | 0.70 – 0.95 | 0.75 – 0.85 | Good for strength and hardenability. Keep it in the middle of the road. |
| P | ≤ 0.035 | ≤ 0.012 | Phosphorus is the enemy. It segregates to grain boundaries and makes the steel brittle. Low P is non-negotiable. |
| S | ≤ 0.035 | ≤ 0.010 | Sulfur makes manganese sulfides. Those stringers? They are crack starters under cyclic stress. We pay for the low-sulfur stuff. |
| Cr | 0.45 – 0.70 | 0.55 – 0.65 | For depth hardening. We need it consistent. |
| Ni | 0.45 – 0.75 | 0.60 – 0.70 | For toughness. The nickel gives us that impact resistance we need in the core when it’s cold out. |
| Mo | 0.20 – 0.30 | 0.22 – 0.27 | Molybdenum controls hardenability and helps prevent temper embrittlement. A must-have. |
| Cu | ≤ 0.20 | ≤ 0.15 | Copper can cause hot shortness during forging if it’s too high. We keep a lid on it. |
That table isn’t just numbers on a screen. That’s a purchase order spec. We’d reject a whole heat of steel if the sulfur came in at 0.018%. It cost us more, sure. But the cost of one unplanned shutdown on a 24-hour-a-day frac job? It pays for itself. The standard mechanicals for this stuff, after a standard heat treat? We all know them. They’re the baseline.
Table 2: Mechanical Properties (Standard QT vs. Our Goal)
| Property | Standard Spec (min) | Typical Standard QT (avg) | Our Target for Modified Process (Core) |
|---|---|---|---|
| Tensile Strength (MPa) | ≥ 980 | ~1050 | 1000 – 1100 |
| Yield Strength (MPa) | ≥ 785 | ~850 | 800 – 900 |
| Elongation (%) | ≥ 9 | ~12 | ≥ 12 |
| Reduction of Area (%) | ≥ 40 | ~50 | ≥ 50 |
| Impact Energy (J) @ -20°C | ≥ 47 | ~65 | ≥ 70 |
The standard numbers are fine. They pass the test. But they don’t tell you how long the part will last in the field. They’re a snapshot of a tensile bar, not a moving picture of a swivel under 10,000 psi and 200 bpm.
The “Aha!” Moment: Re-thinking the Heat Treat
The standard process for a swivel is pretty straightforward: carburize the critical wear areas (the ball race, the bore), then harden and temper the whole thing. You get a hard case and a tough core. Works okay.
Klaus and I, we were looking at a failed swivel. The washout started on the inside radius of the bore. We sectioned it. The case was hard, about 58 Rockwell C. The core was about 32. The crack had started at the surface, right where the carbide case met the softer core in that radius. The standard process left a sharp transition. That transition is a stress riser. It’s a line in the sand for a fatigue crack. The crack would start in the case, zip down to that interface, and then just rip through the core because it was the path of least resistance.
Klaus took a puff on his pipe and said, “What if we don’t give it a path? What if we make it work for every inch?”
That’s when we landed on the idea of a modified austempering process. Not a full austemper, but a hybrid. We wanted to create a gradient of microstructures, not a sharp boundary. We wanted to slow that crack down by making it travel through different neighborhoods.
Here’s the process we roughed out, and it’s been tweaked over the years. We call it our “tough-core, graded-case” process.
Step 1: The Prep and Carburize
We get the rough-machined swivel. The bore and the ball race are left with a little stock for final grinding. Everything else is masked with a copper plating to stop carburization. Then, into the furnace.
-
Heat Up: 150°C/hr. No thermal shock. These aren’t simple shapes.
-
Carb Cycle: 920°C. We run a two-stage boost-diffuse cycle. The goal is a deep, relatively flat carbon profile. We don’t want a super-high carbon skin that’s all brittle carbide. We want a gradient.
-
Boost: 1.10% carbon potential for 12 hours. This soaks carbon into the surface.
-
Diffuse: 0.85% carbon potential for 5 hours. This allows the carbon to diffuse deeper into the steel, creating that gradient. The surface carbon comes down a bit, but the carbon at 1.5mm depth goes up.
-
Result: A case depth of 1.8mm to 2.5mm. Surface carbon around 0.70% to 0.75%. At 2.0mm deep, carbon is around 0.45% to 0.50%.
-
Step 2: The Interrupted Cool
After carb, we don’t just quench it. We drop the temperature in the furnace to 830°C, then transfer it to a nitrogen cooling station. This cools it down to about 650°C slowly, in a controlled way. Think of it as a glorified normalize. It refines the grain structure from the long carb cycle and gets the microstructure ready for the final hardening. It’s a step a lot of shops skip, and it’s a mistake.
Step 3: The Hybrid Austemper (The Klaus Special)
This is the heart of it. We reheat the swivel, slowly (200°C/hr), to 820°C in a salt bath. Salt bath is key – no oxidation, no decarb. We soak it for just 30 minutes to austenitize.
Then, the transfer. Into the austempering bath. This is a molten salt mix – 55% NaNO2 and 45% KNO3. We hold this bath at 280°C, with a range of 270°C to 290°C. And here’s where it’s different. We hold it for 2 hours.
Now, look at the TTT diagram for 20CrNiMo. At 280°C, you’re in the lower bainite region. But here’s the catch – that’s for the base chemistry. For the carburized case, with its higher carbon? That same 280°C is now in the lower bainite range for that steel. So, during those 2 hours, the high-carbon case transforms to lower bainite. Hard, tough, wear-resistant. But what about the core? The core, with its lower carbon, its bainite nose is at a higher temperature. At 280°C, it’s doing almost nothing. It’s just sitting there, still as austenite.
Step 4: The Water Quench
After the 2-hour hold in the salt, we pull it out and – this is the part that scared the production guys – we dunk it in ambient-temperature water. We quench it for 3 to 5 minutes. What happens? The core, which was still soft austenite at 280°C, now gets cooled rapidly. It transforms. But it doesn’t transform to brittle, high-carbon martensite. It’s low-carbon martensite. Tough, lath martensite. And that thin layer of retained austenite that might be left in the case? The water quench helps convert some of that too.
What we end up with is a beautiful, layered structure. The surface is strong, tough lower bainite. Just below that, as the carbon content drops, you get a mix of lower bainite and some tough martensite. And the core is all tough, low-carbon martensite. There’s no sharp line. It’s a gradient. A crack trying to grow from the surface has to fight its way through bainite, then a bainite/martensite mix, then martensite. It’s like trying to run through a forest, then a swamp, then a briar patch. It just slows down.
Table 3: Process Parameter Comparison
| Parameter | Standard Carb & Harden | Hybrid Austemper Process |
|---|---|---|
| Carb Temp / Time | 920°C / Boost & Diffuse | 920°C / Boost & Diffuse |
| Pre-Cool | Direct to quench | Slow cool to 650°C (Grain Refinement) |
| Austenitize | 830-850°C / Oil Quench | 820°C / Salt Bath |
| Quench Medium | Hot Oil (~60°C) | Stage 1: Salt Bath @ 280°C for 2 hours |
| Final Quench | Air cool or oil | Stage 2: Ambient Water Quench (3-5 min) |
| Temper | 180-200°C / 2 hours | Optional 250°C / 4 hours (Stress Relief) |
The Proof is in the Pulling
So, what did we get? We pulled samples from the first batch we ran.
-
The Surface (Hardened Area): Microstructure was almost all lower bainite. Beautiful, acicular needles. Hardness? 51 to 55 HRC. Perfect for wear resistance.
-
The Core: Low-carbon, lath martensite. Hardness? 32 to 35 HRC. Perfect for toughness. The impact tests came back even better than the standard numbers.
-
The Transition Zone (at 2.0mm depth): A mix. You could see bainite plates next to martensite laths. Some retained austenite, but not much. Hardness? Around 45 HRC. A perfect gradient.
Table 4: Micro-hardness Profile (HV1)
| Distance from Surface (mm) | Standard Process | Hybrid Austemper Process |
|---|---|---|
| 0.1 (Surface) | 650 (Martensite) | 580 (Lower Bainite) |
| 0.5 | 620 | 540 |
| 1.0 | 580 | 500 |
| 1.5 | 520 | 460 |
| 2.0 | 420 (Start of Core) | 430 (Mix Zone) |
| 3.0 (Core) | 350 | 350 |
| 5.0 (Core) | 330 | 340 |
See the difference? The standard process has a cliff. The hardness drops off a table from 580 to 420 between 1.5 and 2.0mm. The hybrid process is a ramp. It’s a gradual decline. That ramp is what stops cracks.
The Field Test: A West Texas Summer
We put a dozen of these modified swivels on a spread in the Delaware Basin. It was August. 105 degrees. They were running 24/7, pumping a mix of slickwater and cross-linked gel with a ton of 100-mesh and 40/70 sand. High pressure, high rate.
The standard swivels on that same spread were lasting about 80 stages before we’d see the first signs of wear in the radius during our daily visual inspections. The new ones? We ran them for 120 stages. Then 140. One of them went to 165 stages before we pulled it for a routine PM, and even then, the bore looked acceptable. The washout rate, measured by a simple go/no-go gauge we made for the internal radius, was less than half of the standard parts at 100 stages.
The formula? If you want to approximate the erosion life, we started using a modified version of the standard API wear prediction, but we had to factor in the material’s resistance. We’re not talking rocket science, but it gave us a way to compare.
A simple erosion model for a directional change (like a swivel) is something like:
E=K∗Vn∗f(θ)∗(1/H)
Where:
-
E = Erosion rate
-
K = Particle angularity factor (constant for a given job)
-
V = Fluid velocity
-
n = Velocity exponent (typically 2.0 – 2.5 for steel)
-
f(θ) = Impact angle function (max for ductile materials is around 30°, but in a radius, it’s complex)
-
H = Material hardness
We started using H not as a single surface hardness number, but as a function of depth. We called it the “gradient hardness factor” – H_eff. We never really formalized it, but in our heads, the higher hardness at 1.5mm depth on the hybrid part meant that as the surface wore away, the material underneath was still harder than on a standard part. So, the erosion rate didn’t accelerate as fast. The standard part would wear the case, hit the soft core, and then just melt away. The hybrid part? It kept fighting.
What We Learned (The Hard Way)
This process isn’t a silver bullet. We had some teething problems.
-
Distortion: The water quench after the salt bath? That caused some distortion issues on the first few parts. We had to go back and tweak the fixturing and the rough machining stock to account for it. The geometry of the 50-type swivel is complex. Thin walls near the handle, thick sections at the hub. Uneven cooling is a bitch.
-
The Optional Temper: We found that for some applications, especially in cold weather (like North Dakota in January), that optional 250°C temper for 4 hours was necessary. It brought the surface hardness down just a hair (to 48-52 HRC) but bumped the toughness up even more. It reduced the risk of the case cracking from impact if the iron got bumped during rig-up. A hard case is great, but a brittle case is a disaster.
-
It’s Not Just the Iron: We put these super-swivels on a spread, but the crew used cheap thread dope and the hammer union nuts were cross-threaded. Doesn’t matter how good your metallurgy is if the connection fails. It’s a system, remember?
Conclusion: The Relentless Pursuit of the Extra 10%
So, where are we now? This hybrid austemper process is our standard for high-cycle, high-pressure swivels now. We’ve tweaked the times and temperatures for different sizes – the 4-inch iron gets a slightly longer diffuse cycle than the 3-inch. It’s all about controlling that carbon gradient and the subsequent phase transformation.
Looking ahead, I see two things. First, the industry is pushing pressure higher. 15,000 psi, 20,000 psi working pressure is coming. At those stresses, the stress corrosion cracking risk goes through the roof. Our bainitic case might help there, because bainite is generally more resistant to SSC than high-carbon martensite. We’re doing some slow-strain-rate testing on that now. Second, we’re looking at in-situ monitoring. If we can put a simple sensor on the swivel to detect the acoustic signature of a crack starting in that transition zone, we can pull it before it washes out. That’s the next frontier.
For now, this process works. It’s not magic. It’s just paying attention to the phase transformation, controlling the carbon, and making the crack work for every millimeter of growth. It’s what Klaus used to call “giving the steel a fighting chance.” And in this business, that’s all you can ask for. Because when that iron lets go, it doesn’t care about your spreadsheet. It only cares about physics. And metallurgy. And we just gave it a better set of rules to play by.


You must be logged in to post a comment.